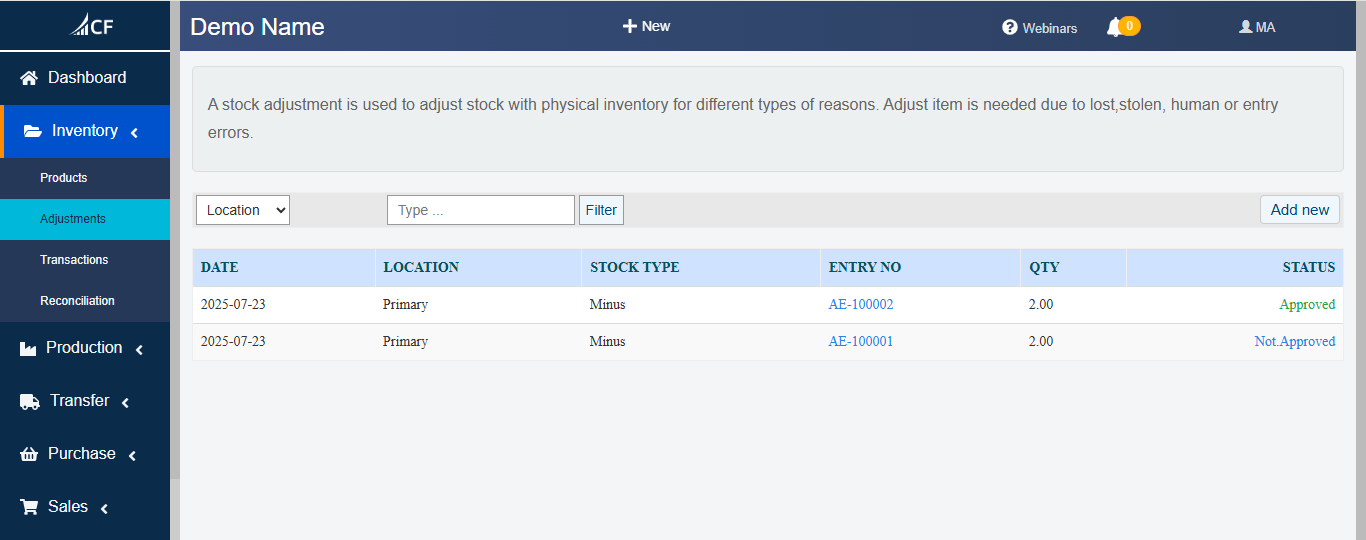
Stock adjustments in Cash Flow Inventory are designed to reconcile discrepancies between the physical inventory count and the recorded inventory in the system. These discrepancies may arise due to reasons such as lost or stolen items, human errors, or data entry mistakes.
This feature enables users to adjust stock levels—either by increasing or decreasing quantities—to ensure that inventory records accurately reflect the actual stock on hand. Stock adjustments are critical for maintaining accurate inventory management, supporting financial reporting, and ensuring operational efficiency.
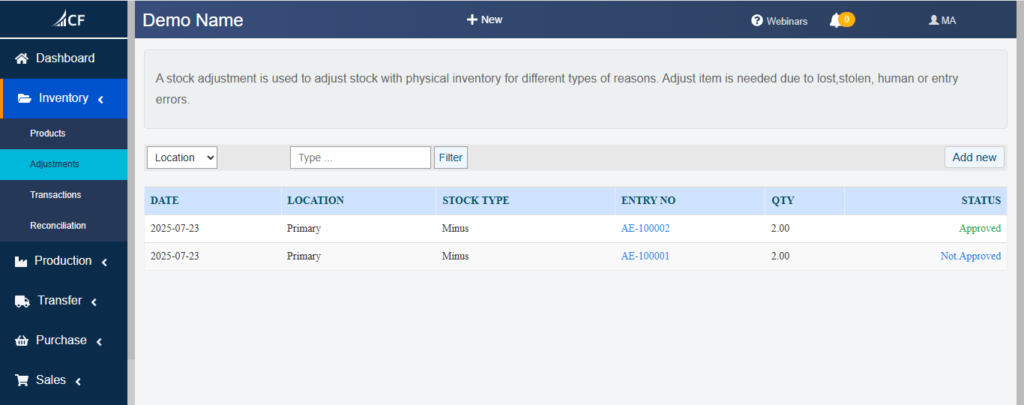
Accessing the Stock Adjustments Module
To access the stock adjustments feature:
- Log in to your Cash Flow Inventory account.
- Navigate to the sidebar menu on the left side of the interface.
- Click the “Inventory” option (represented by a box icon) to expand its submenu.
- Select “Adjustments” (highlighted in teal when active) from the submenu to open the stock adjustments page.
The sidebar also includes other modules such as Dashboard, Products, Transactions, Reconciliation, Production, Transfer, Purchase, Sales, Payroll, and Taxes, but “Adjustments” is the focus for this feature.
Viewing and Filtering Stock Adjustments
The stock adjustments page displays a list of existing stock adjustment records in a table format. This table provides a quick overview of all adjustments made within the system.
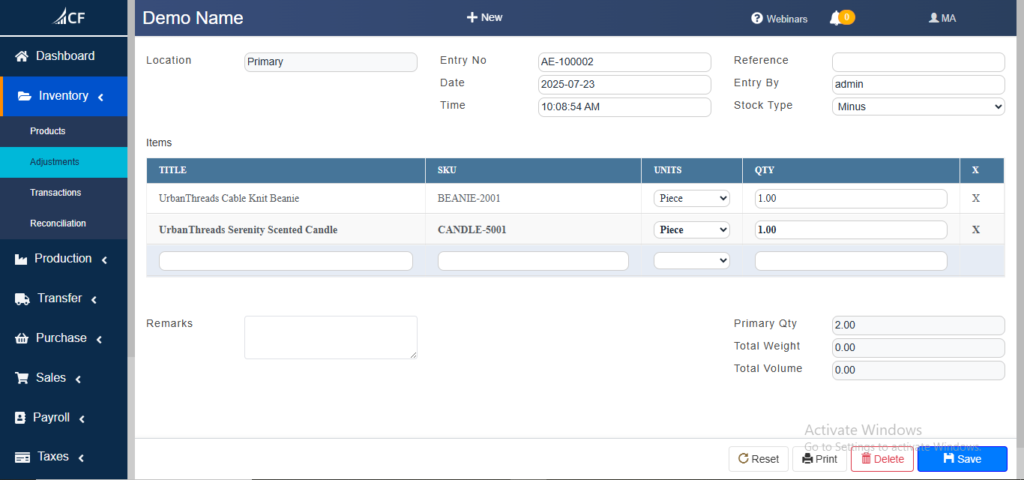
Table Columns
- DATE: The date the adjustment was recorded (e.g., “2025-07-23”).
- LOCATION: The inventory location associated with the adjustment (e.g., “Primary”).
- STOCK TYPE: Indicates whether the adjustment increases (“PLUS”) or decreases (“MINUS”) stock levels.
- ENTRY NO: A unique identifier for the adjustment (e.g., “AE-100002”).
- QTY: The total quantity adjusted (e.g., “2.00”).
- STATUS: The approval status of the adjustment:
- “Approved” (displayed in green text).
- “NotApproved” (displayed in red text).
Filtering Adjustments
To narrow down the list of adjustments:
- Select a location from the “LOCATION” dropdown (e.g., “Primary”).
- Select an adjustment type from the “TYPE” dropdown (e.g., “Minus” or “Plus”).
- Click the “FILTER” button to apply the selected filters and update the table.
This filtering capability is particularly useful for businesses managing multiple locations or needing to review specific types of adjustments.
Creating a New Stock Adjustment
To initiate a new stock adjustment:
- On the stock adjustments page, locate the “+ New” button in the header or the “Add new” button above the adjustments table.
- Click either button to open the stock adjustment form.
Both buttons serve the same purpose, providing flexibility in how users start the process.
Stock Adjustment Form
The stock adjustment form is a detailed interface where users input the specifics of the adjustment. It is divided into several sections:
General Information
- Location: A dropdown menu to select the inventory location (e.g., “Primary”). This specifies where the adjustment applies.
- Entry No: Automatically generated unique identifier (e.g., “AE-100002”). The “AE” prefix likely stands for “Adjustment Entry,” followed by a sequential number.
- Date: The date of the adjustment (e.g., “2025-07-23”), which can be manually selected or defaults to the current date.
- Time: Automatically recorded time of the adjustment (e.g., “10:06:54 AM”).
- Reference: An optional text field for adding a reference number or note (e.g., an invoice number or internal code).
- Entry By: Displays the username of the person creating the adjustment (e.g., “admin”).
- Stock Type: A dropdown to specify the adjustment type:
- MINUS: Decreases stock quantity (e.g., for lost or damaged items).
- PLUS: Increases stock quantity (e.g., for found items or corrections). Note: While “PLUS” is not explicitly shown in the screenshots, it is inferred as a logical counterpart to “MINUS.”
Items Table
This section allows users to list the items being adjusted:
- Columns:
- Title: The name or description of the item (e.g., “UrbanThreads Cable Knit Beanie” or “Bohemian Bluffs Embroidered Scarf”).
- SKU: The stock-keeping unit identifier (e.g., “BEANIE-2001” or “BBABC-8501”).
- Units: A dropdown to select the unit type (e.g., “Piece” or “Each”).
- QTY: The quantity to adjust (e.g., “1.00”). Enter the number of units being added or removed.
- Delete: A red “X” button to remove an item from the list.
- Adding Items: Additional rows can be populated by entering details for more items. A blank row is typically available for this purpose.
- Multiple Items: Users can adjust multiple items within a single entry (e.g., two items with a quantity of 1.00 each).
Remarks
- A text area labeled “Remarks” allows users to add notes or comments (e.g., “Items damaged during shipping” or “Inventory correction due to miscount”). This field is optional but valuable for audit trails and record-keeping.
Summary
- Located on the right side of the items table, this section provides an overview of the adjustment:
- Primary QTY: The total quantity adjusted (e.g., “2.00” for two items of 1.00 each).
- Total Weight: The combined weight of adjusted items (e.g., “0.00” if not applicable or configured).
- Total Volume: The combined volume of adjusted items (e.g., “0.00” if not applicable or configured).
Saving and Approving Stock Adjustments
Saving an Adjustment
- After entering all required details in the form, click the “Save” button (blue button with a floppy disk icon) at the bottom right.
- The adjustment is saved and added to the adjustments table, initially marked as “NotApproved” (in red text) if an approval process is required.
Approving an Adjustment
- Open the saved adjustment from the table or directly after saving.
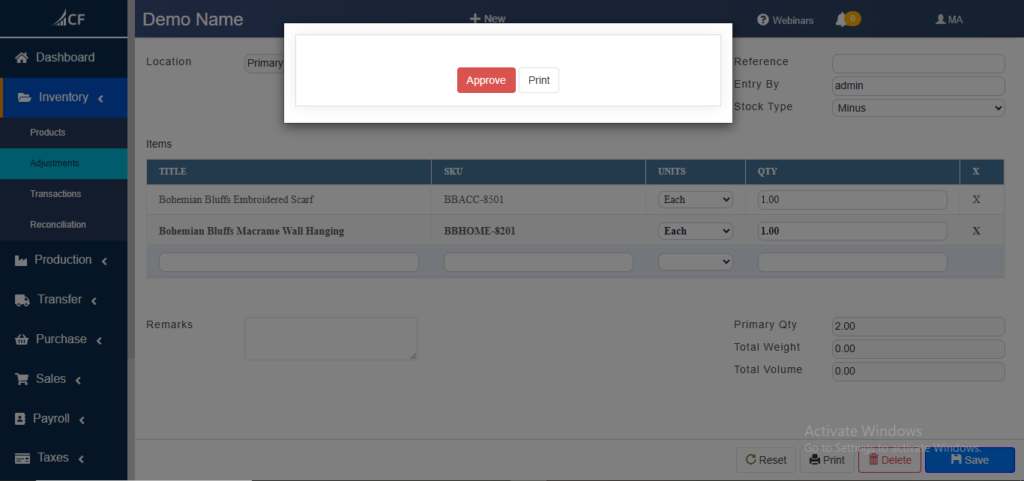
- A popup or modal window may appear with an “Approve” button (pink button).
- Click “Approve” to finalize the adjustment, changing its status to “Approved” (in green text).
- Only authorized users (e.g., those with admin privileges) may have permission to approve adjustments, depending on the system’s configuration.
This approval workflow ensures oversight and accuracy in inventory changes.
Printing Stock Adjustment Details
To generate a record of the adjustment:
- Open the adjustment form (either a new entry or an existing one).
- Click the “Print” button:
- Available in the action buttons at the bottom right (printer icon).
- Also present in the approval popup (white button with a black border).
- A printable version of the adjustment details is generated, suitable for physical records or digital archiving.
This feature supports documentation for audits, compliance, or internal tracking.
Additional Actions
The stock adjustment form includes several action buttons at the bottom right:
- Reset: A button with a circular arrow icon. Clears the form to its initial state, allowing users to start over.
- Delete: A red button with a trash can icon. Removes the stock adjustment entry entirely. Use with caution, as this action may be irreversible.
- Save: A blue button with a floppy disk icon. Saves the current adjustment (as described above).
- Active Windows: A small link or label indicating open tabs or windows within the application, aiding navigation in multi-tasking scenarios.
Best Practices
- Authorization: Restrict stock adjustments to authorized personnel to maintain control over inventory changes and prevent errors.
- Documentation: Use the “Remarks” field to record the reason for each adjustment (e.g., “Lost in transit” or “Entry error correction”) for transparency and auditing purposes.
- Regular Reconciliation: Periodically review stock adjustments alongside physical counts to ensure ongoing accuracy.
- Approval Process: Leverage the approval workflow to verify adjustments, especially for significant changes or high-value items.
- Backups: Print or save digital copies of adjustments for record-keeping, particularly for compliance or financial reporting.
Notes on Current Features
Based on the updated screenshots:
- The interface supports both “MINUS” and inferred “PLUS” stock types, though only “MINUS” is explicitly shown. This flexibility accommodates various adjustment scenarios.
- The approval popup is a current feature, indicating an enhanced workflow for finalizing adjustments.
- Weight and volume fields are present but default to “0.00,” suggesting optional tracking that may require additional configuration (e.g., item-specific settings).
- The consistent presence of “Add new” buttons reflects an emphasis on user-friendly access to creating adjustments.
This documentation reflects the latest design and functionality as of the provided screenshots, ensuring users have a complete guide to the Stock Adjustments module in Cash Flow Inventory.
Found this helpful? Share it:
Stock adjustments in Cash Flow Inventory are designed to reconcile discrepancies between the physical inventory count and the recorded inventory in the…
Stock adjustments in Cash Flow Inventory are designed to reconcile discrepancies between the physical inventory count and the recorded inventory in the…
Stock adjustments in Cash Flow Inventory are designed to reconcile discrepancies between the physical inventory count and the recorded inventory in the…